
How to Buy a Bitcoin Rune Tokens
A Step-by-Step Guide


Bitcoin Runes are unique digital assets on the Bitcoin blockchain, allowing for utility and programmability in ways similar to tokens on other networks but directly rooted in Bitcoin. If you’re interested in acquiring a Bitcoin Rune, here’s a simple guide to help you through the process.
Step 1: Set Up a Bitcoin-Compatible Wallet
Before you can buy a Bitcoin Rune, you’ll need a compatible wallet to store it. Xverse is a great choice for managing Bitcoin-based NFTs and tokens like Runes. Xverse supports Bitcoin Runes and provides a secure, user-friendly interface.
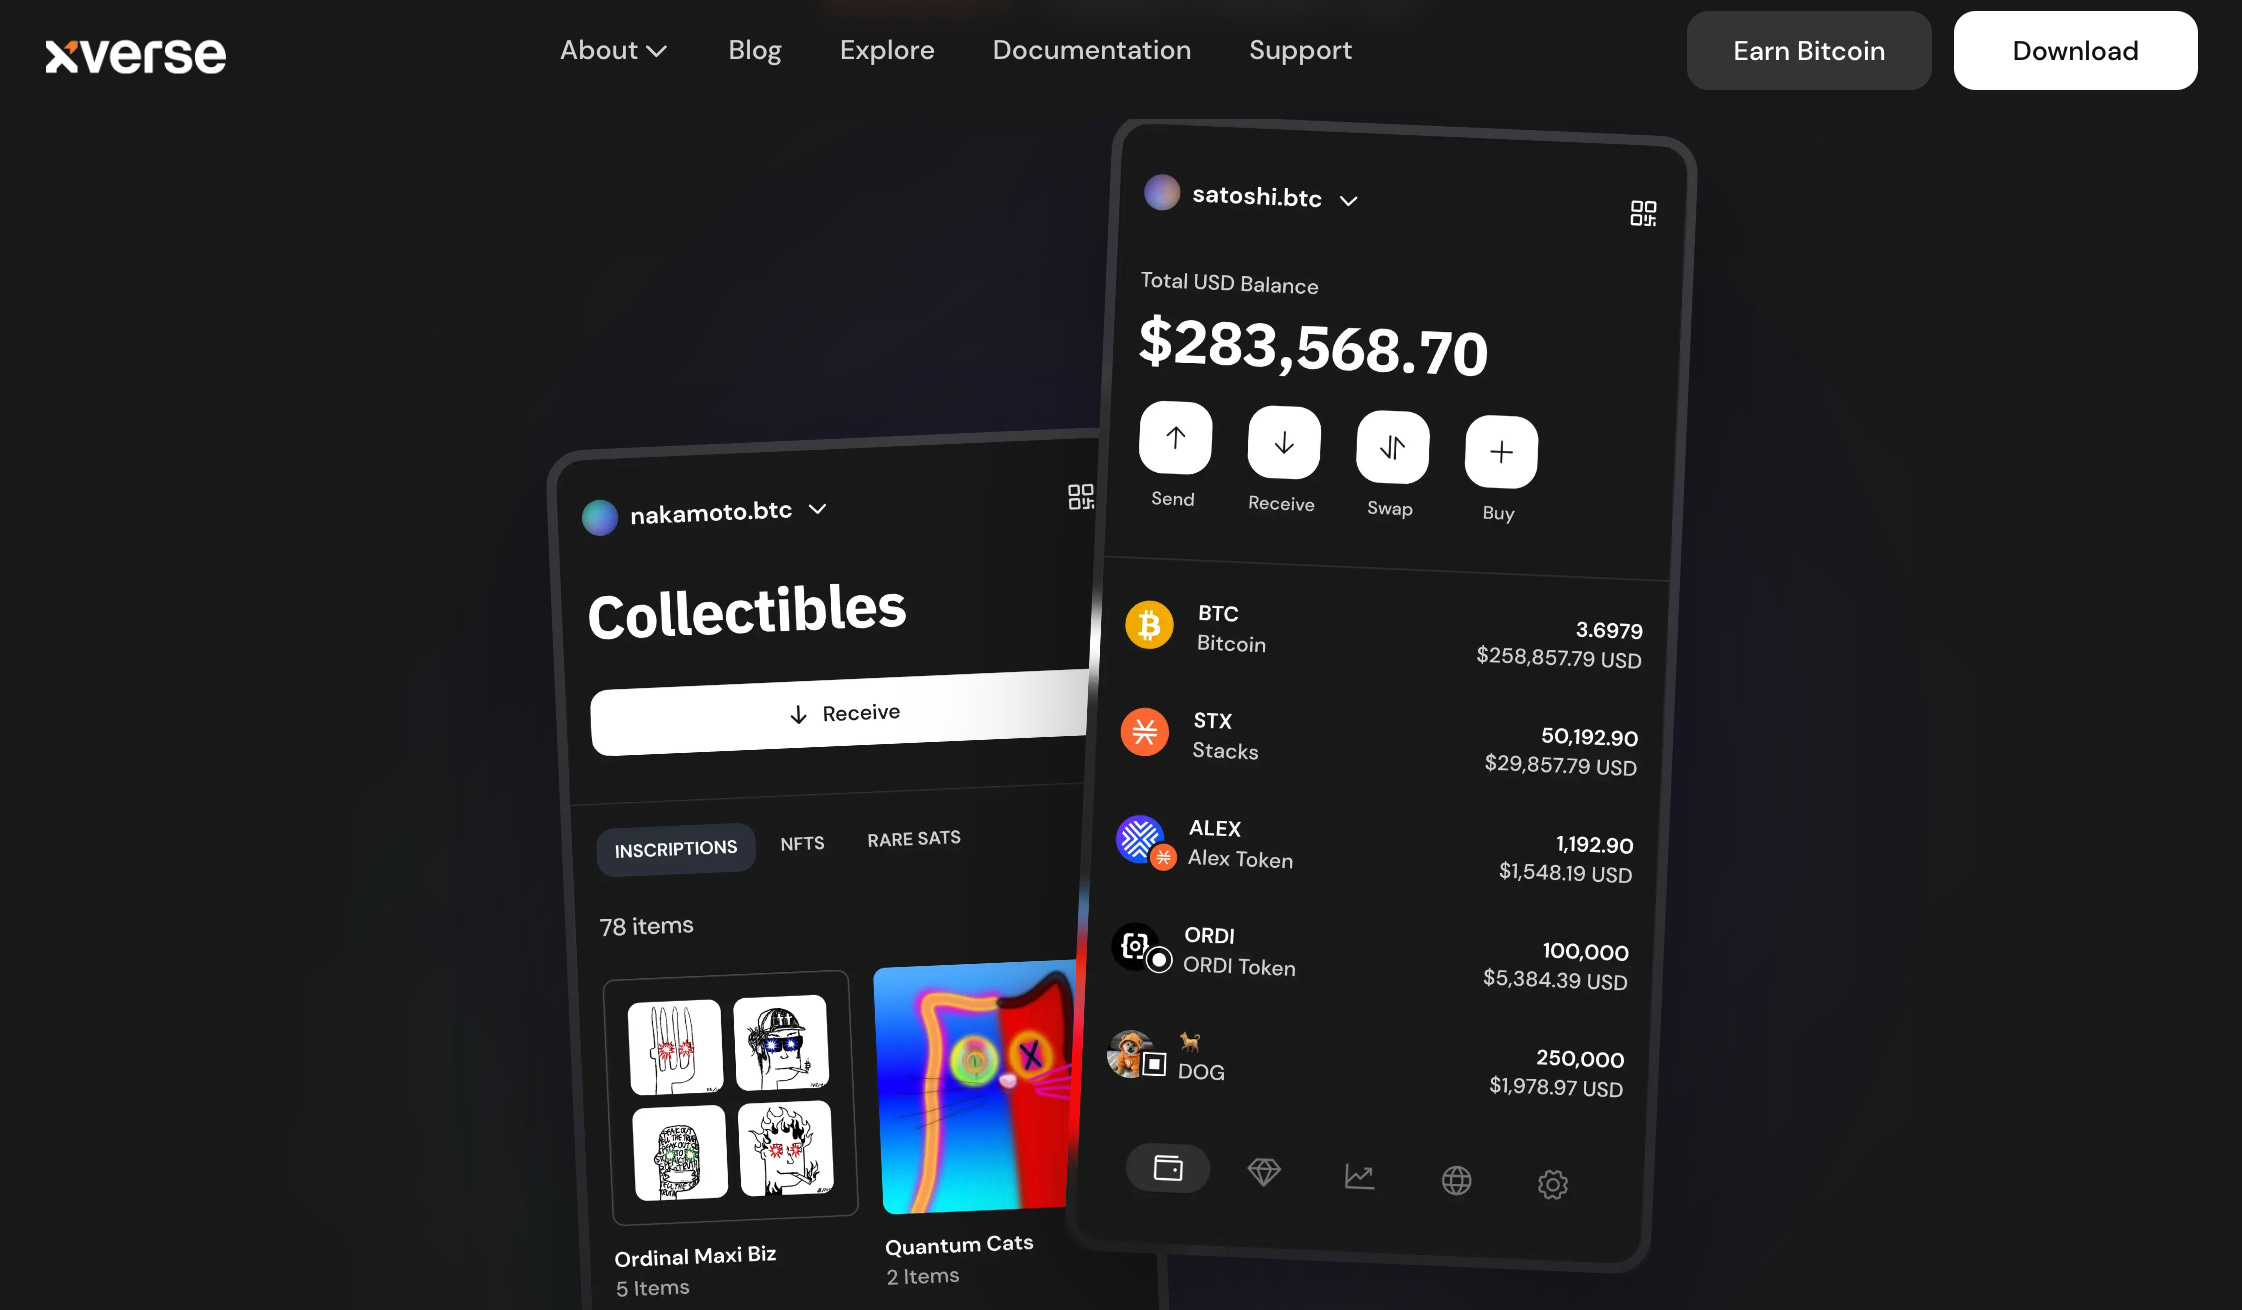
Download Xverse: Visit the Xverse website or app store, download the app, and set up your wallet.
Secure Your Wallet: Write down your recovery phrase and store it in a safe place. This will allow you to recover your wallet if needed.
Add Bitcoin to Your Wallet: To buy Runes, you’ll need some Bitcoin in your wallet to cover the purchase and any associated fees.
Step 2: Choose an Exchange That Supports Bitcoin Runes
Exchanges like Magic Eden and Unisat are popular platforms for buying Bitcoin Runes. Both exchanges allow you to connect your wallet, browse available Runes, and make purchases.
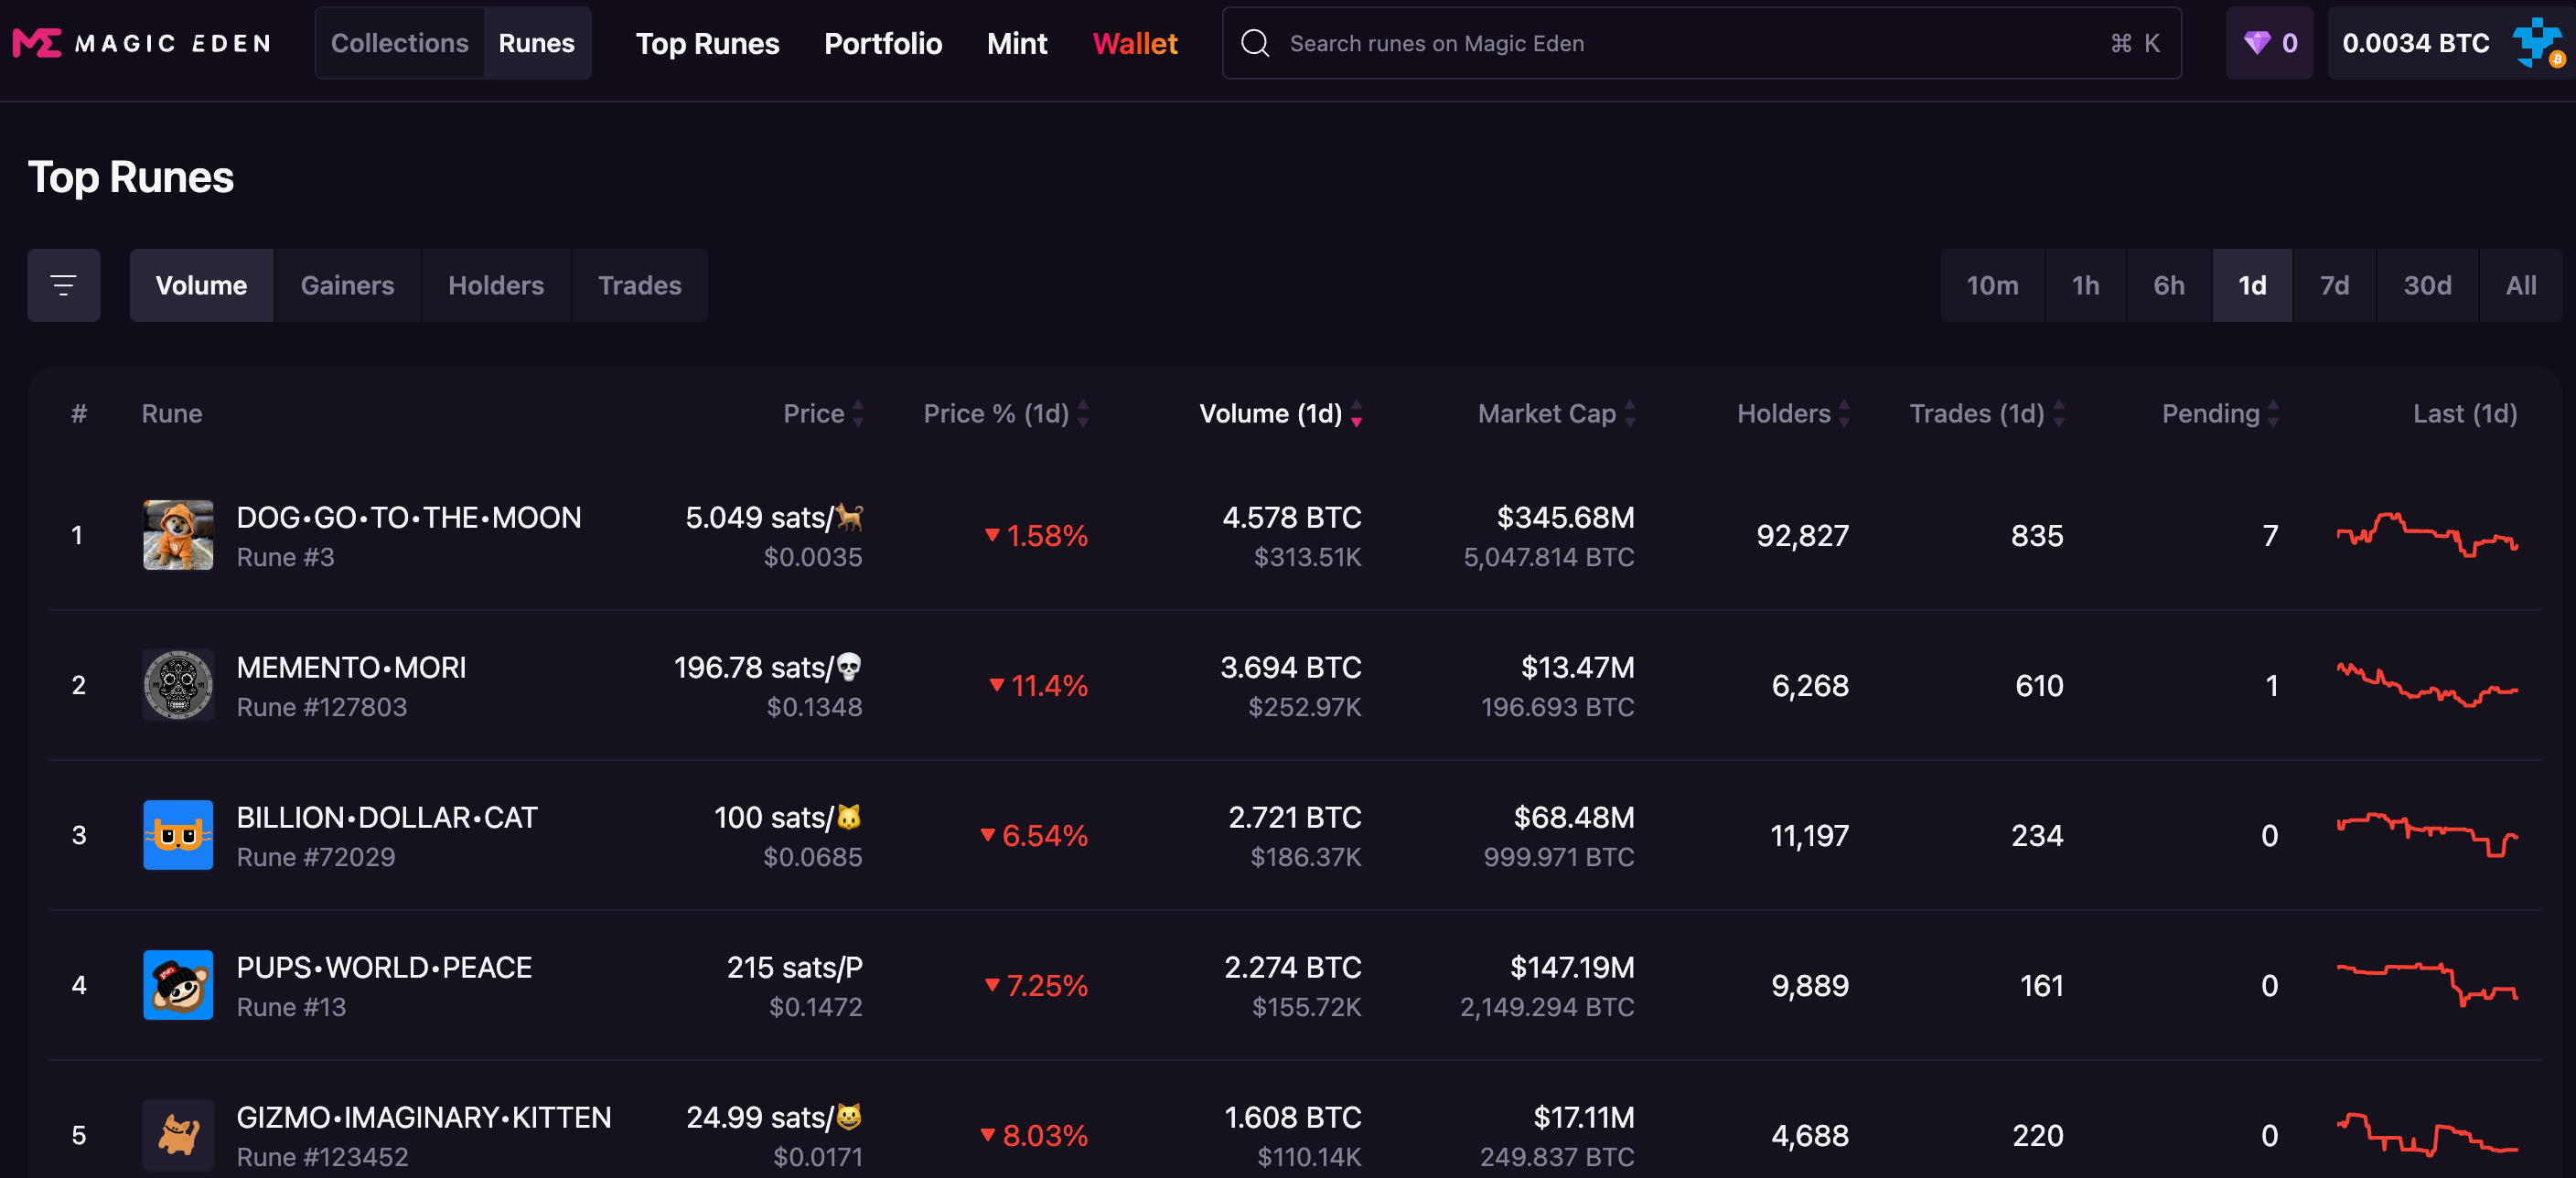
Magic Eden: An Overview
Magic Eden is a well-known marketplace for digital assets on multiple blockchains, including Bitcoin. Here’s what you’ll see when navigating the marketplace:
Explore the Market: On Magic Eden, click on the Bitcoin section to view available Runes. You can explore different collections or search for specific Runes by name or creator.
Rune Listings: Each Rune listing includes information such as the current price, number of items, and creator details. You can view the Rune’s details, including its inscription and unique attributes.
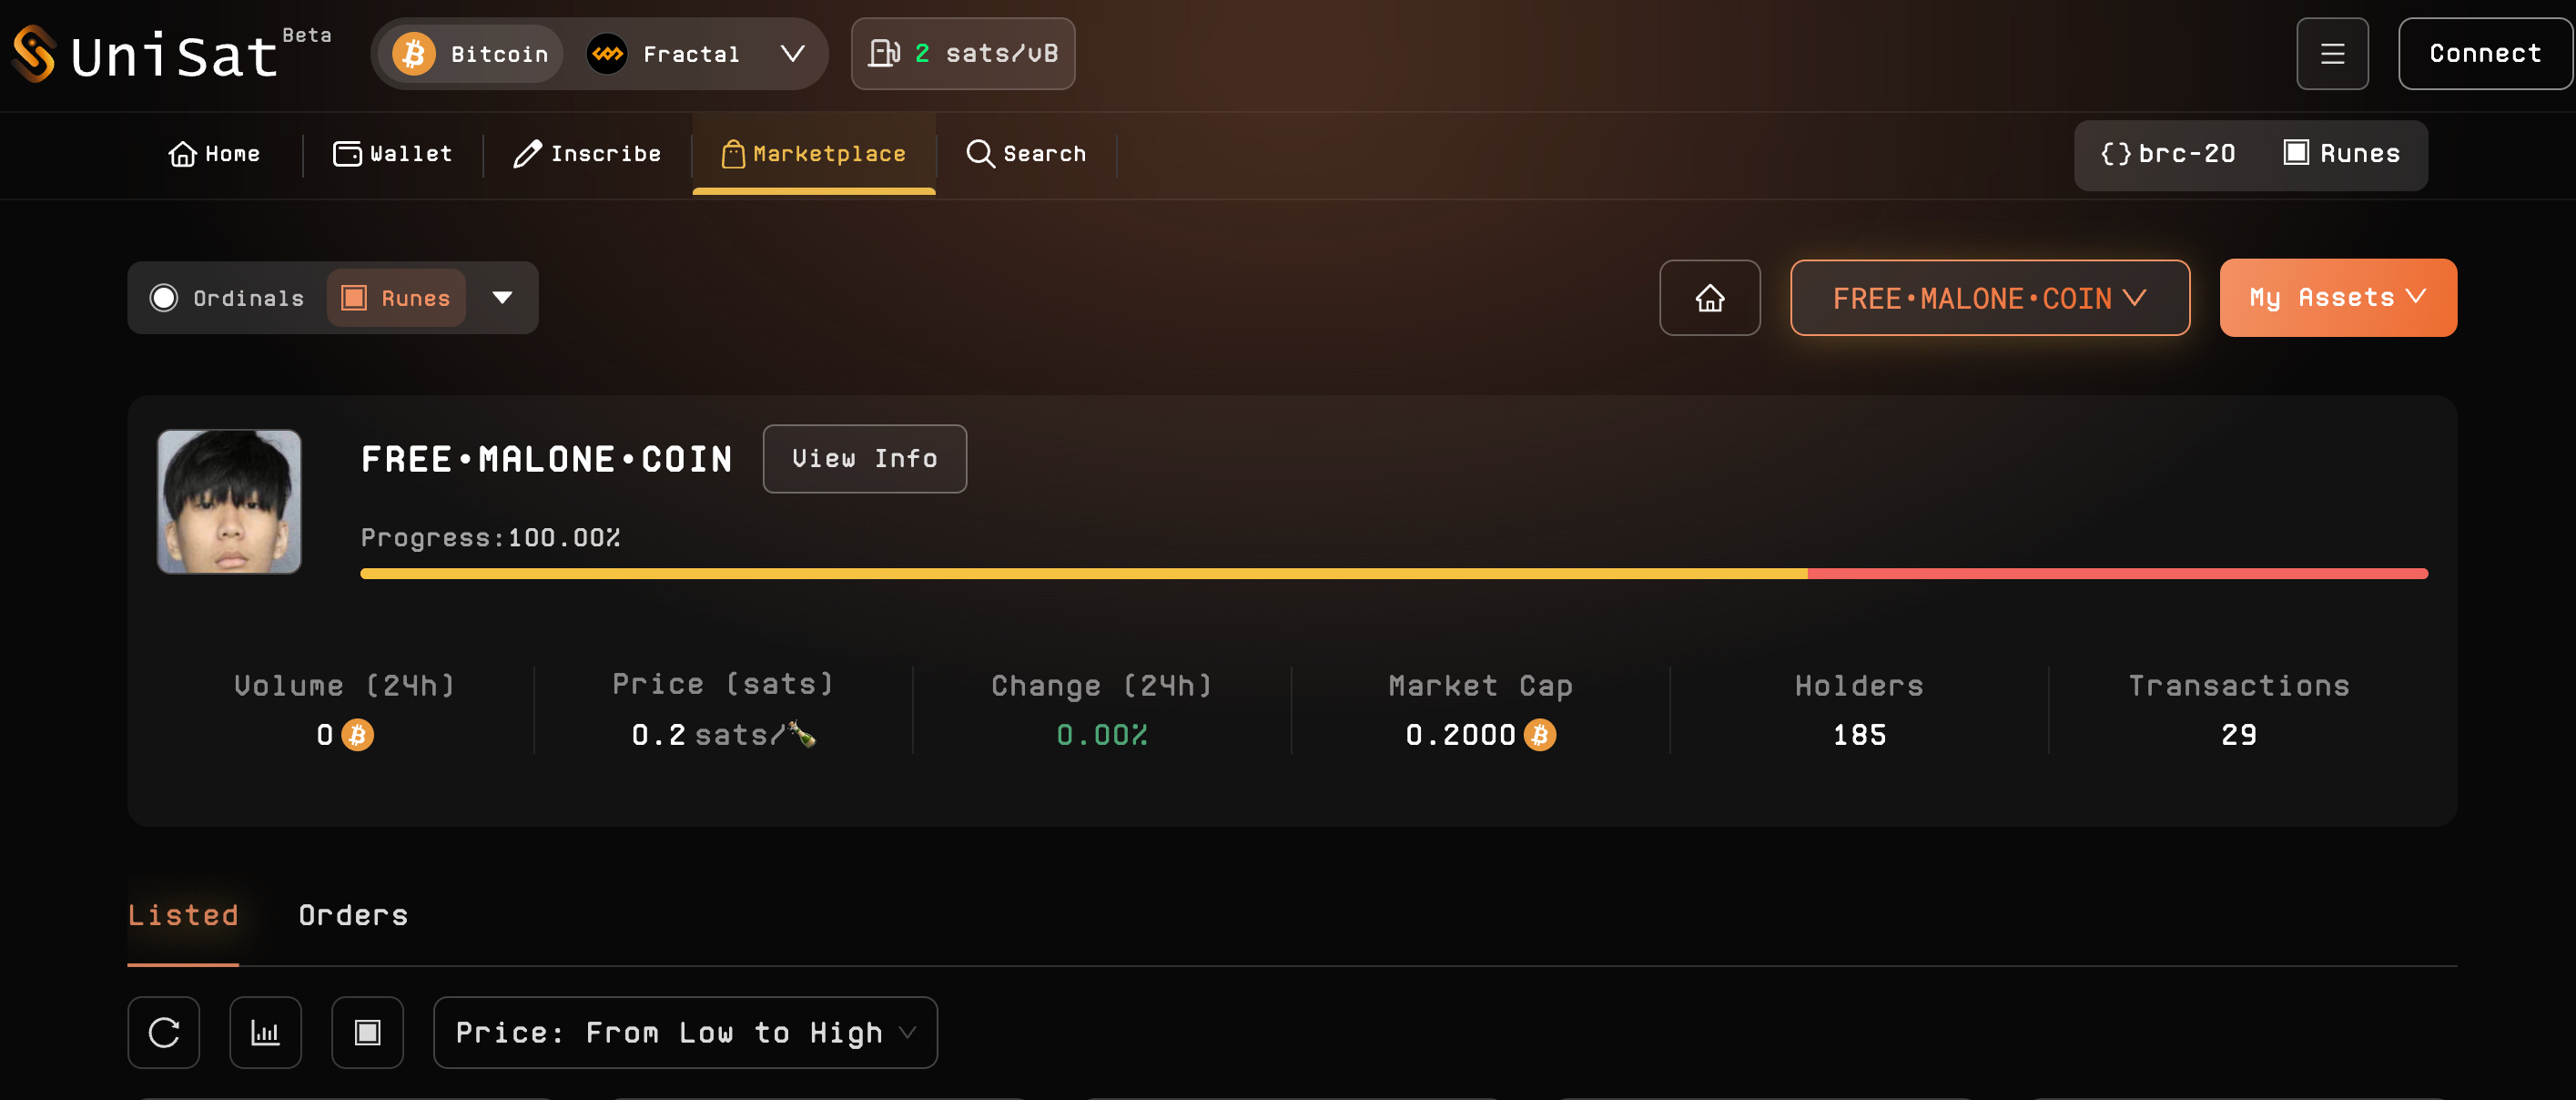
Unisat: Another Option for Runes
Unisat also supports Bitcoin-native assets, making it a good alternative for those looking to buy Runes.
Browse Runes: Search for Runes or filter by specific criteria like collection, rarity, or price.
Rune Details: Clicking on a Rune reveals details about its inscription, history, and other attributes.

Step 3: Connect Your Wallet to the Exchange
After selecting an exchange, you’ll need to connect your Xverse wallet to enable transactions.
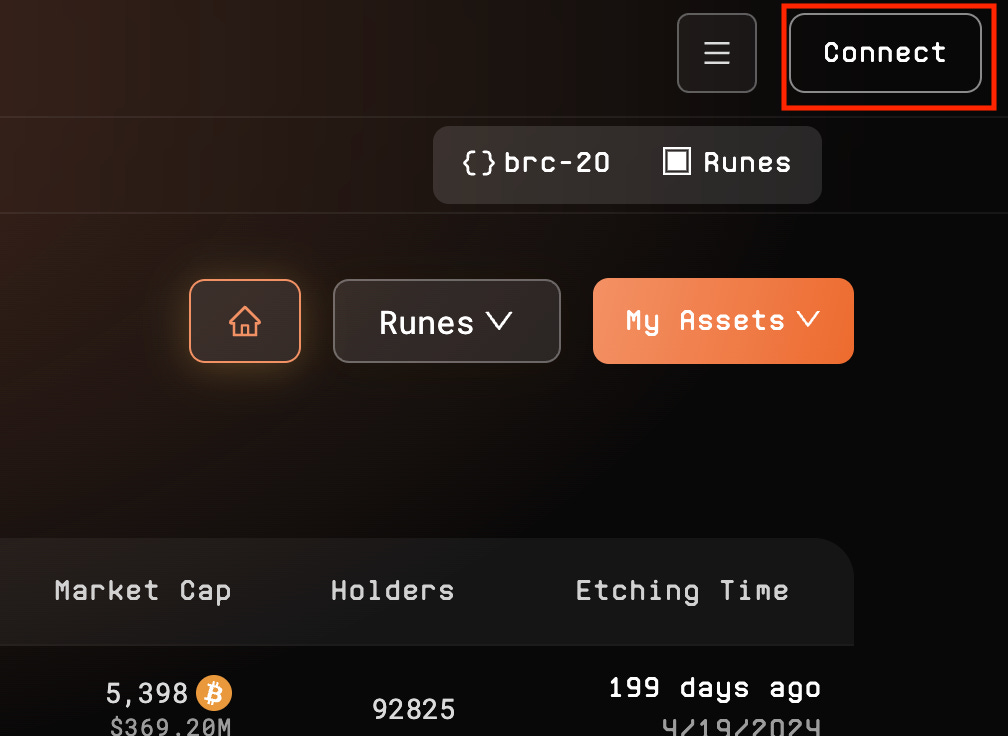
Connect Wallet: Look for the Connect Wallet button on the exchange. Select Xverse from the list of compatible wallets.
Authorize Connection: Follow the prompts to approve the connection between your wallet and the exchange.
Transfer Bitcoin: Make sure you have enough Bitcoin in your wallet to cover the Rune’s cost and any transaction fees.
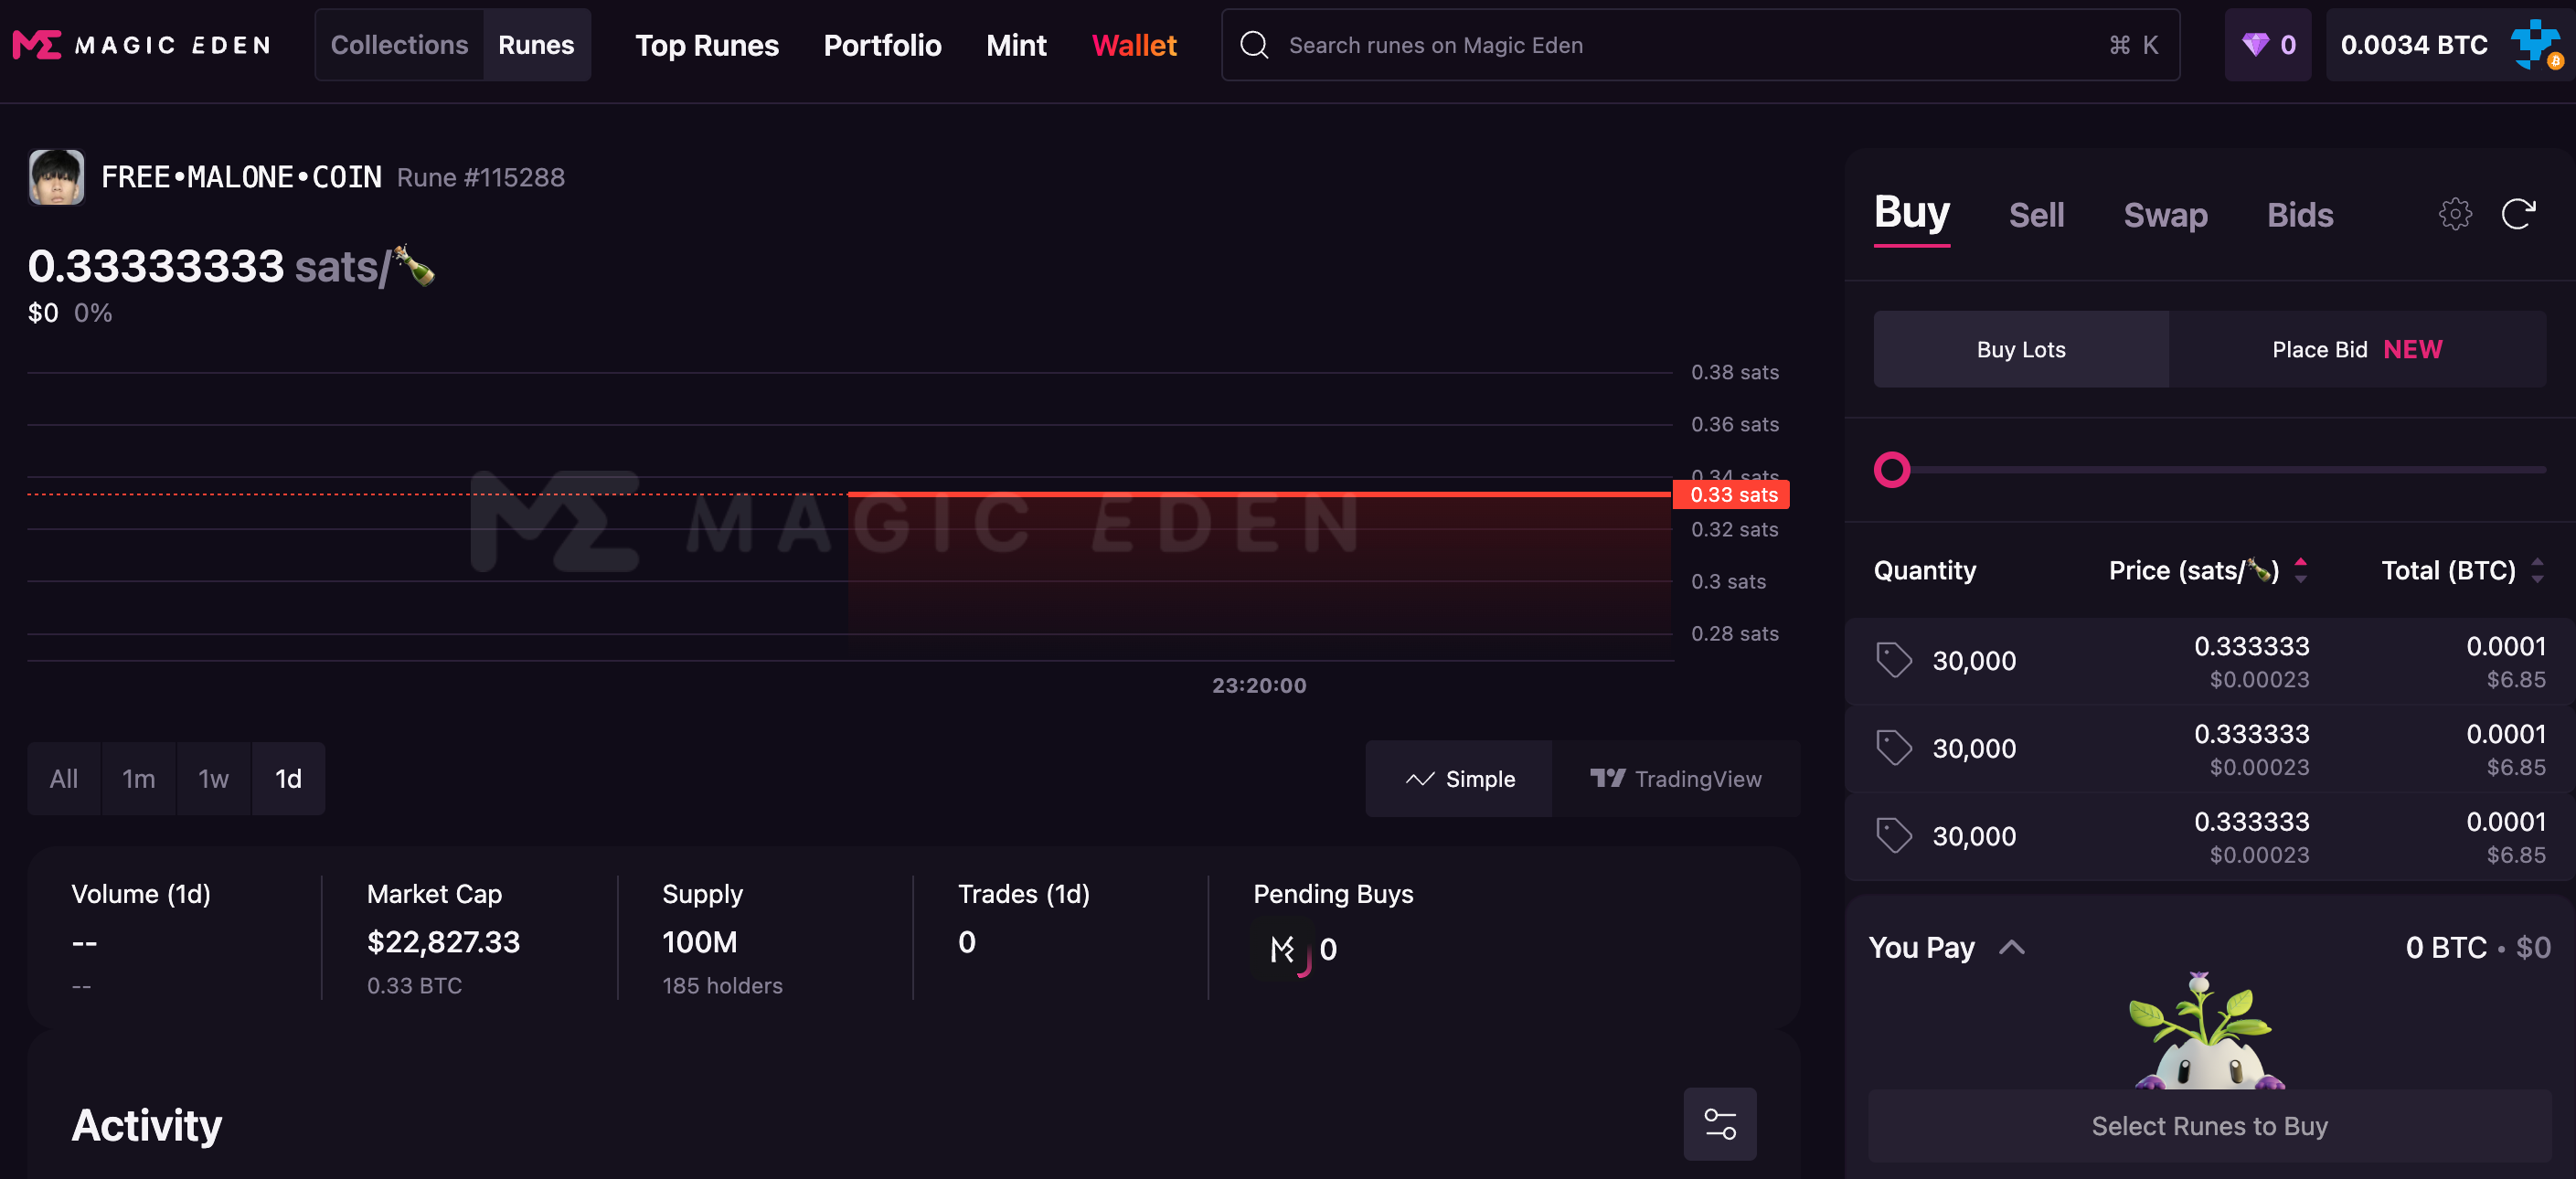
Step 4: Purchase Your Bitcoin Rune
With your wallet connected, you’re ready to buy your Bitcoin Rune. Here’s how:
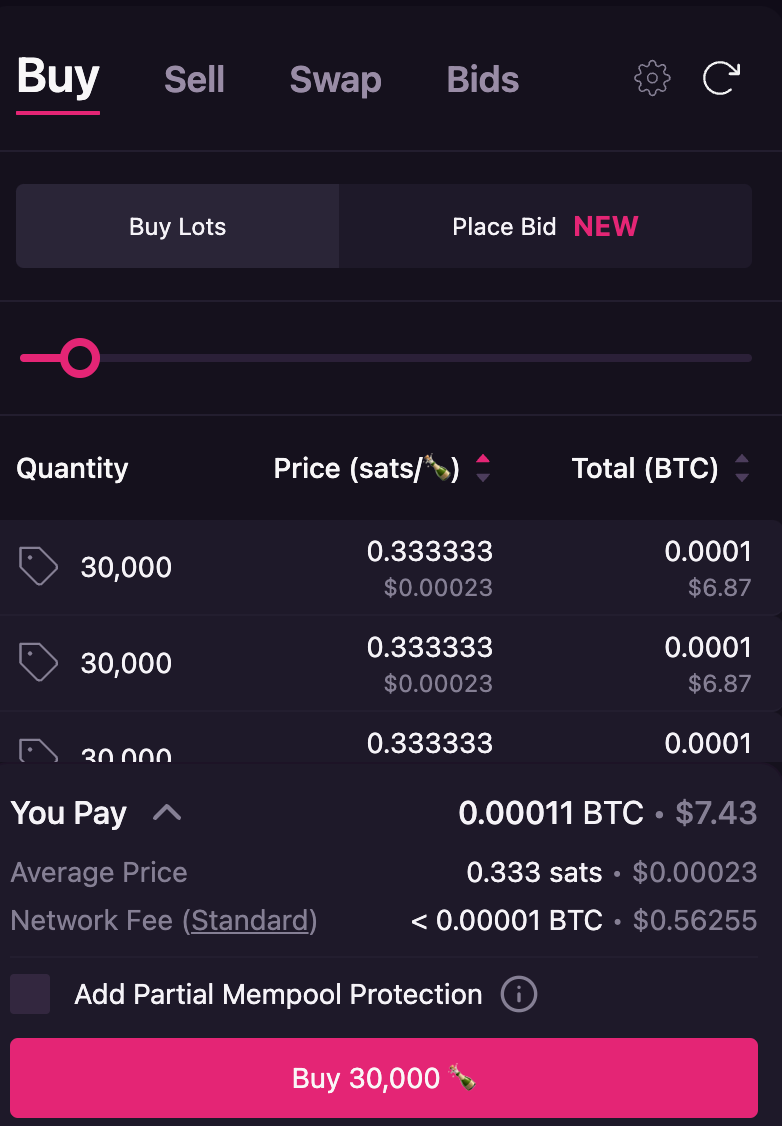
Select a Rune: Browse the exchange and choose the Rune you wish to buy. You can view the Rune’s unique attributes, inscription details, and current price.
Make the Purchase: Click on the Buy button. The exchange will prompt you to confirm the transaction in your Xverse wallet.
Confirm Payment: Approve the transaction, and the Bitcoin Rune will be transferred to your wallet. This process may take a few minutes to complete, depending on network traffic.
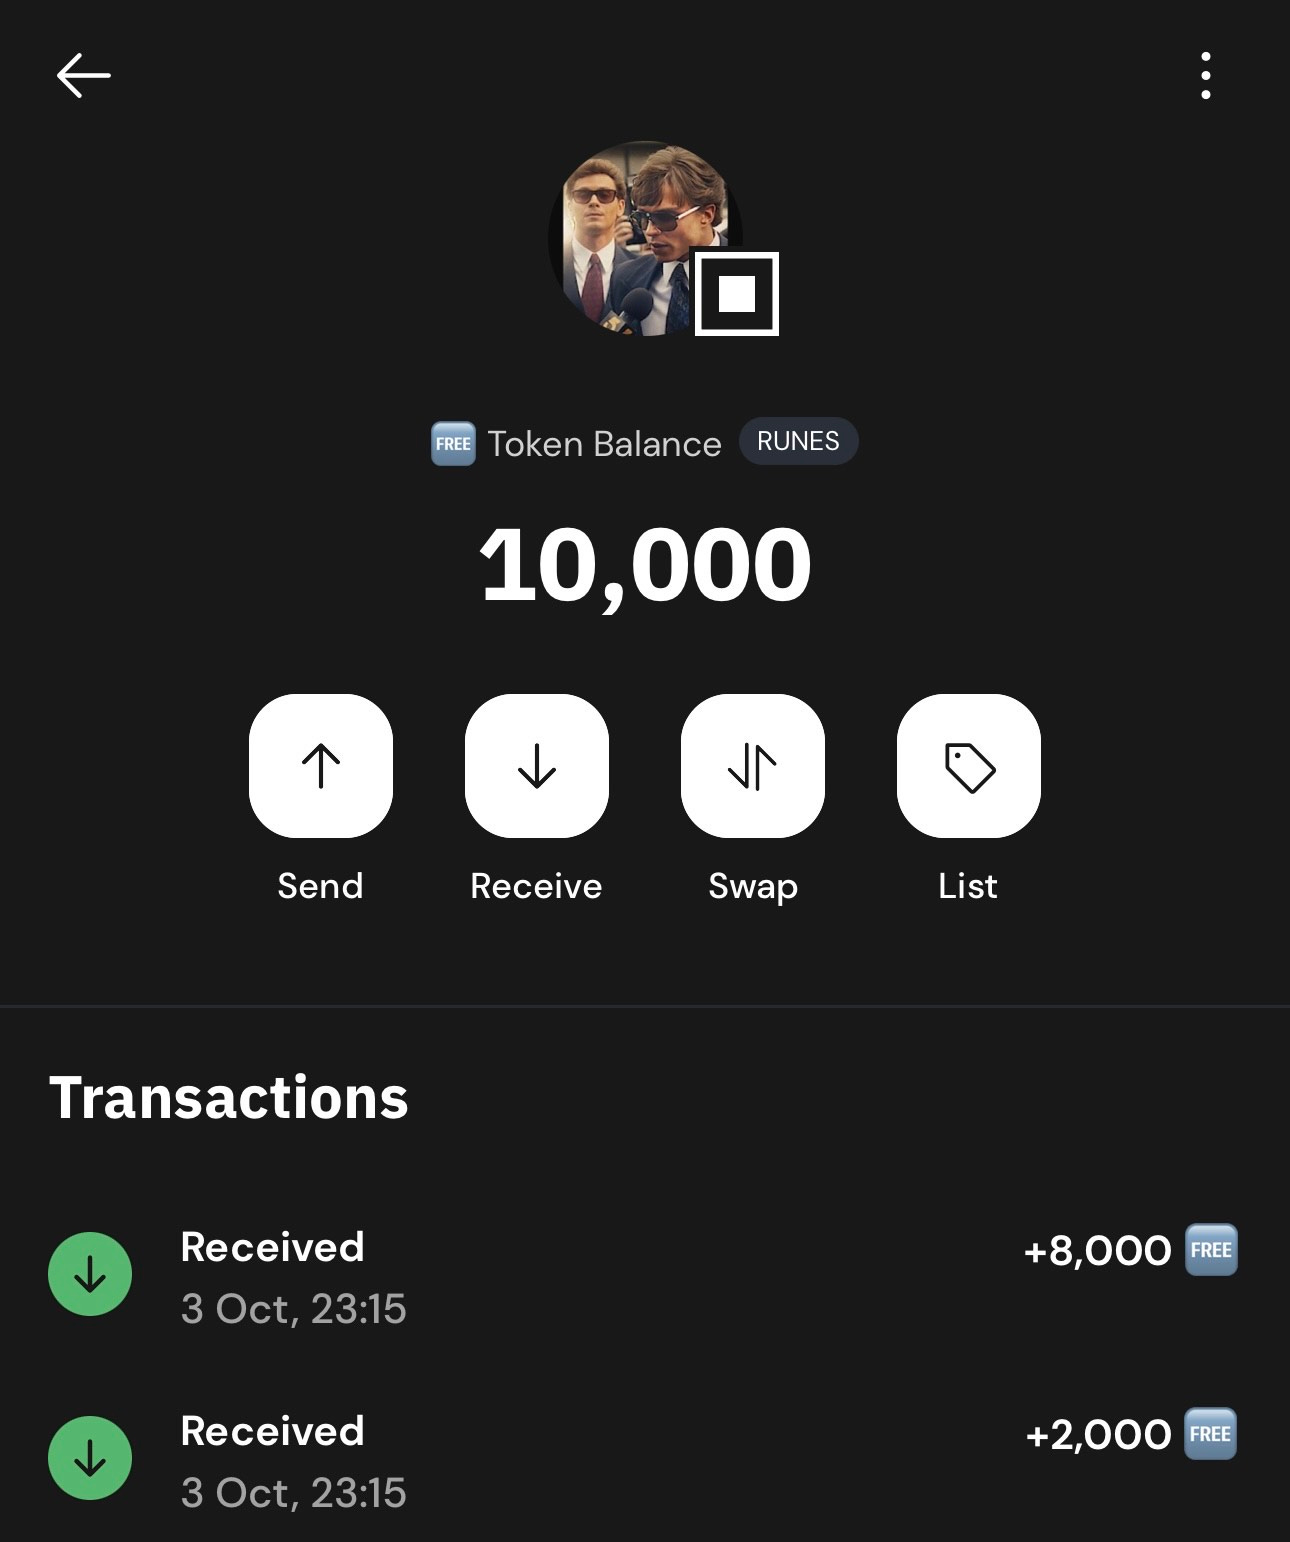
Step 5: View and Manage Your Bitcoin Rune in Xverse
Once you’ve completed your purchase, you can view and manage your Rune directly within the Xverse app.
Check Your Collection: Open your Xverse wallet and navigate to the NFT or token section to view your newly acquired Bitcoin Rune.
Secure Your Rune: Xverse stores your Rune securely within your wallet, allowing you to hold, trade, or showcase it as part of your digital asset collection.
Free Bitcoin Meme Coin Airdrop
Buy Bitcoin Miners - BitcoinCapitalist.io
Buy Bitcoin ATMs - CubeATMs.com
Connect on Linkedin
Connect on Twitter
Bitcoin Capitalist - Telegram Group
Linktree - All Links
Bitcoin Conference Tickets - Promo code “BitcoinCapitalist” 10% off